
Tile Spacers and Leveling Systems: Professional Guide
A high-end tile finish depends on more than just selecting premium materials. Uneven edges (lippage) and irregular grout lines can immediately compromise the appearance and safety of an entire floor or wall.
Using tile spacers and leveling systems ensures uniform grout joints, flush transitions, and a clean, professional finish. Here is a breakdown of how both tools work, their core differences, and how to use them together.
What Are Tile Spacers?
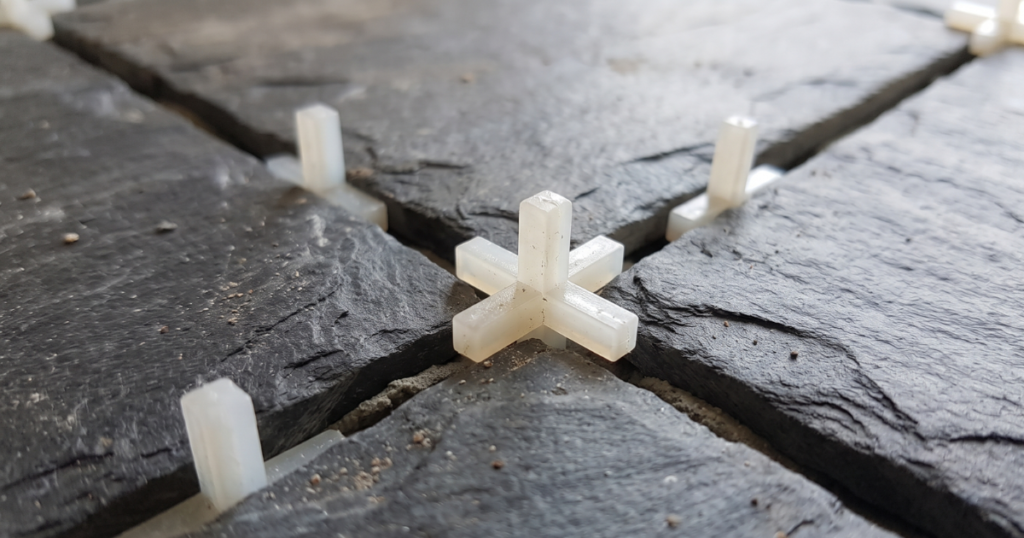
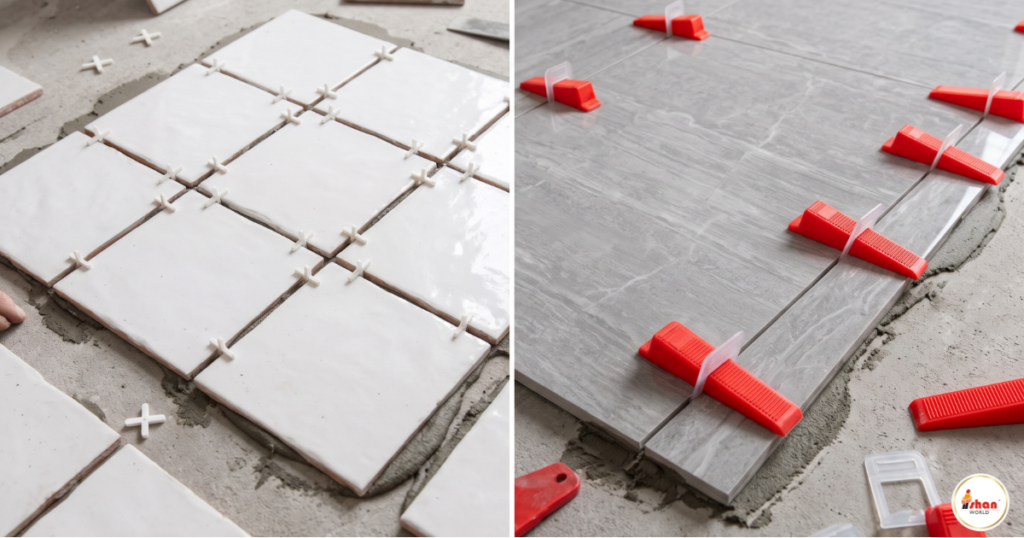
Tile spacers are small cross-shaped or T-shaped plastic pieces placed between adjacent tiles. Their sole purpose is to establish and maintain a uniform gap width for grout.
Key Benefits:
- Keep grout joints straight, uniform, and balanced across large areas.
- Prevent tiles from shifting inward while adhesive cures.
- Come in standardized widths (e.g., 1.5mm, 2mm, 3mm, 5mm) to match design specifications.
Note: Spacers control horizontal spacing only. They do not level uneven tile surfaces.
What Is a Tile Leveling System?
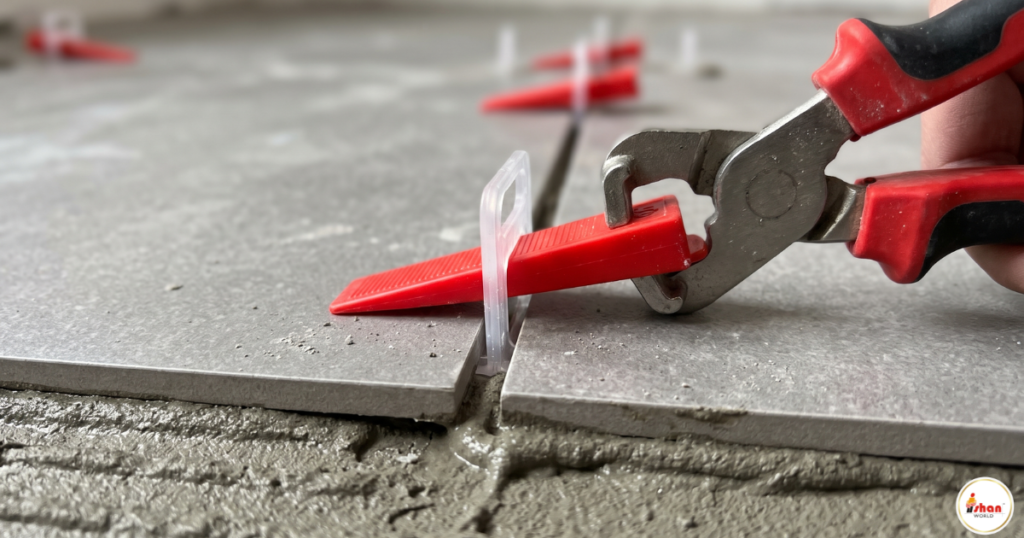
A tile leveling system uses interlocking clips, wedges, or rotating caps to pull neighboring tiles flush with one another while the mortar or adhesive sets.
Key Benefits:
- Prevents Lippage: Pulls high and low edges together to eliminate trip hazards and uneven heights.
- Essential for Large-Format Tiles: Large slabs (e.g., 600x1200mm or bigger) naturally carry slight warps; leveling clips hold tension until the adhesive bonds flat.
- Secures Overnight Setting: Prevents tile slumping as wet mortar shrinks during curing.
Tile Spacers vs Tile Leveling Systems
| Feature | Tile Spacers | Tile Leveling Systems |
| Primary Goal | Controls horizontal grout joint width | Controls vertical tile height & surface alignment |
| Components | Cross, T-shaped, or horseshoe plastic pegs | Base clips, tension wedges, or spin caps |
| Best For | All standard floor and wall tiles | Large-format slabs, rectified tiles, uneven walls |
| Reusability | Often reusable depending on placement | Wedges/caps are reusable; base clips break away |
| Substrate Fix | Cannot fix uneven floors | Cannot replace proper screed/floor prep |
Both tools are frequently used together: base clips maintain horizontal spacing while wedges lock down surface level.
Step-by-Step: How to Use Both Tools Correctly
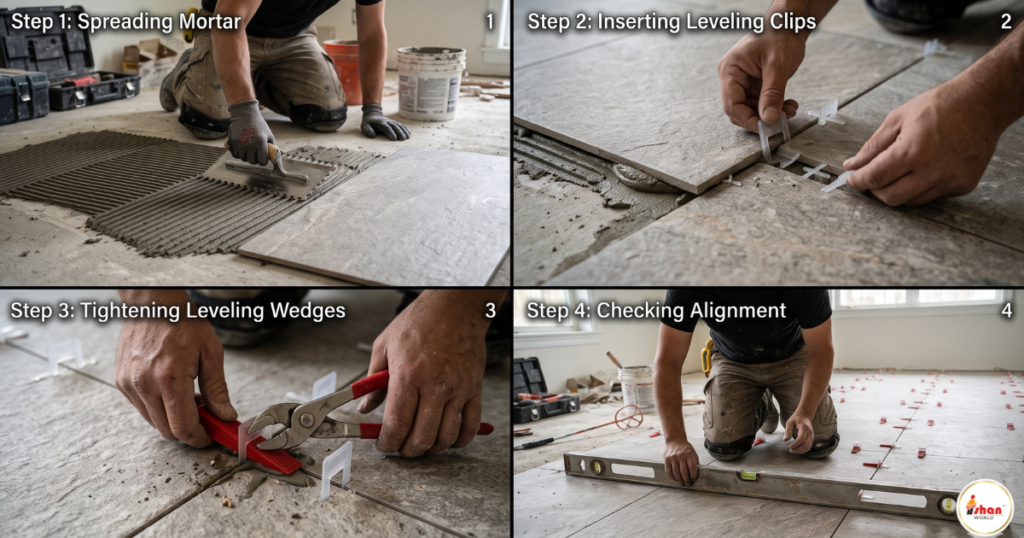
- Prep the Substrate: Ensure the base floor or plaster is flat, sound, and fully cured. Leveling systems cannot flatten an unlevel screed.
- Apply Adhesive with a Notched Trowel: Spread mortar evenly and back-butter large tiles for 100% coverage.
- Insert Leveling Clips & Spacers: Slide leveling base clips under the tile edges (typically 2 clips per edge for slabs) and insert corner spacers.
- Lock Wedges with Pliers: Insert the wedge into the clip opening and apply controlled tension using leveling pliers until the tile faces sit flush.
- Allow Full Cure: Let adhesive cure for 24 hours. Do not kick or knock clips while wet.
- Break Away Clips: Strike the clips parallel to the grout joint using a rubber mallet or your boot. Remove any reusable wedges for your next job.
- Grout Cleanly: Clean any exposed adhesive from joints before applying grout.
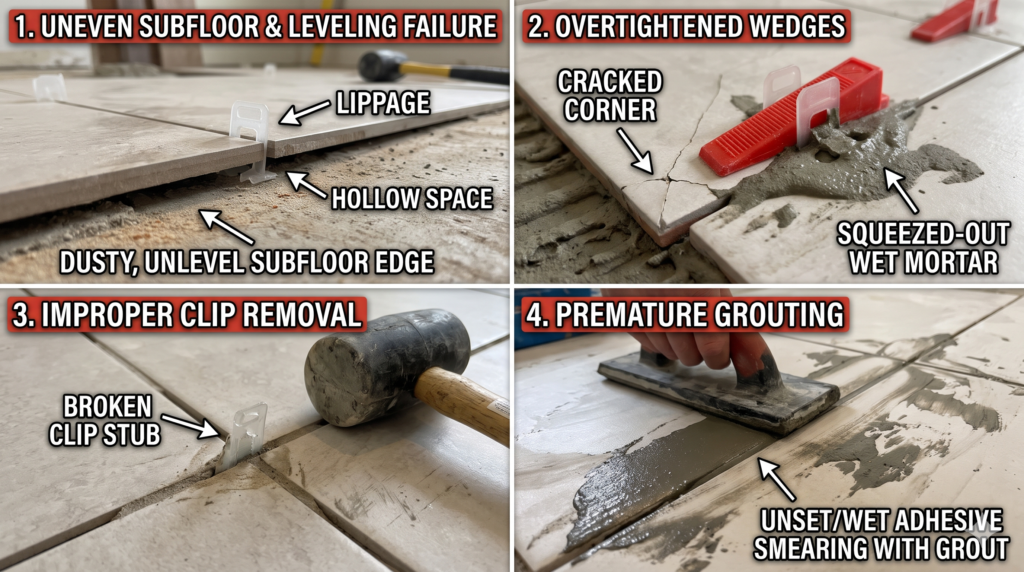
4 Common Mistakes to Avoid
- Relying on Clips to Fix Bad Substrates: Leveling clips align tile edges—they will snap if forced to bridge a hollow subfloor.
- Overtightening Wedges: Excessive plier force can squeeze out thinset, break tiles, or tilt the opposite edge up.
- Late or Improper Clip Removal: Waiting too long or kicking clips diagonally can leave broken plastic pieces trapped in your grout line.
- Grouting Too Early: Always let thinset cure completely before removing leveling hardware and spreading grout.
Explore Ishan World for commercial-grade tiles, precision spacers, leveling systems, and professional installation accessories designed for lasting surfaces.
Frequently Asked Questions (FAQs)
1. Are tile spacers necessary for every installation?
Yes. Spacers ensure thermal expansion space and create even lines for watertight grouting.
2. What spacer size should I use for rectified tiles?
Rectified porcelain tiles with sharp, square edges typically use 1.5mm to 2mm spacers for an ultra-sleek, minimal grout line.
3. Do tile leveling systems eliminate lippage completely?
They significantly reduce lippage, but they cannot overcome unlevel subfloors or improperly mixed thinset mortar.
4. Can I reuse tile leveling clips?
The top wedges or screw-caps are reusable across multiple projects. The base clips are single-use components that break away beneath the tile line.
5. Can tile spacers and leveling systems be used at the same time?
Yes. Many leveling clips have built-in spacing pegs (e.g., 2mm), but additional standard spacers are often added at four-way intersections for extra alignment stability.
Why Choose ISHAN WORLD
When it comes to selecting the right tiles, sanitaryware, bathware, and bath fittings, ISHAN WORLD stands out as a trusted, all-in-one destination for quality, variety, and value. We offer a carefully curated selection of ceramic, porcelain, vitrified, double charge, and full body tiles—sourced from top manufacturing units using the latest technologies.
At ISHAN WORLD, we believe that every space deserves the perfect combination of design, durability, and price. Whether you’re building your dream home, renovating a bathroom, or designing a commercial project, our products match every taste and requirement. From elegant matt finishes to luxury sugar and carving tiles, we provide choices that are both aesthetic and functional.
Our expert guidance, transparent sourcing, and competitive pricing make tile selection easy and hassle-free. We don’t just sell tiles—we help you make informed decisions. Visit ISHAN WORLD today and experience the difference in quality, service, and style.
Join hands with one of India’s fastest-growing tile brands –Ishan World– and build a successful, hassle-free business with our FOFO model, PAS facility, expert support, and exclusive product range designed for modern India.
Connect with ISHAN WORLD to explore hallway tiles in many designs and styles, and create a welcoming and memorable hallway to make lasting impressions.
ISHAN WORLD – Build Beautiful. Live Better.
Contact Us: 7078270782
Visit Us: www.ishanworld.com
Write Us:info@ishanworld.com
Visit our social media handles
Instagram: Click here
Facebook: Click here
WhatsApp: Click here
Pinterest: Click here
Twitter : Click here
YouTube: Click here
Blogspot: Click here
Quora: Click here
Medium: Click here
LinkedIn: Click here
Divya Store: Click Here
Navya Store: Click Here
Express Store: Click Here For Sewla, Click Here For Firozabad